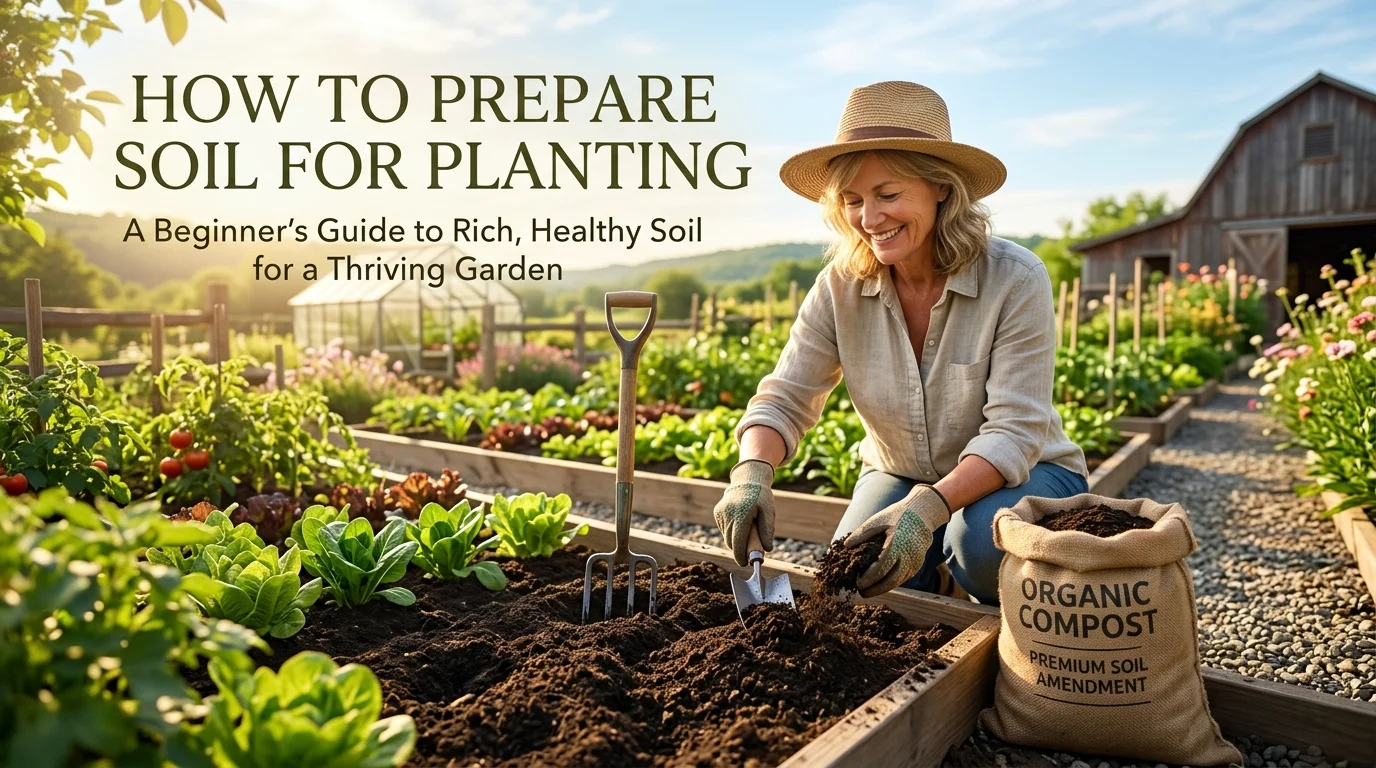
Do you dream of picking fresh, juicy tomatoes and crisp lettuce right from your own backyard? Many new gardeners jump right in and plant seeds, only to wonder why their plants look tired and yellow a few weeks later. In this guide, I will show you exactly how to prepare soil for planting so your garden can thrive all season long.
Quick Answer: To learn how to prepare soil for planting, you should first clear away weeds, test your soil type, and add plenty of rich organic matter like compost. Depending on your space, you can choose between easy no-dig sheet mulching, building raised beds, or setting up a portable growing space.
How to Prepare a Garden Bed for the First Time
If you want to start a backyard garden, you need to know how to prepare a garden bed. It is the very first step to growing healthy food and beautiful flowers. Think of your soil as the foundation of your home. If the foundation is weak, the rest of the house will have trouble standing up.
When you look at your backyard, you might see thick green grass or a patch of weeds. This can feel a bit scary to tackle. Many beginners think they have to rent a big, heavy machine to dig up the dirt. But you do not have to sweat and strain your back to get started.
First, let us look at what is already in your yard. Soil is made of tiny pieces of rock, air, water, and old decayed plants. Most soils fall into three main types. You might have sandy soil, clay soil, or loam.
Sandy soil feels gritty and lets water run through it very fast. This means your plants might get thirsty quickly. Clay soil feels sticky when wet and dries out as hard as a brick. It holds water too well, which can drown your plant roots.
Loam is the dream soil for every home gardener. It is a perfect mix of sand, clay, and organic matter. It holds just the right amount of water and lets plant roots breathe easily. Do not worry if you do not have loam right now. We can easily improve whatever soil you have.
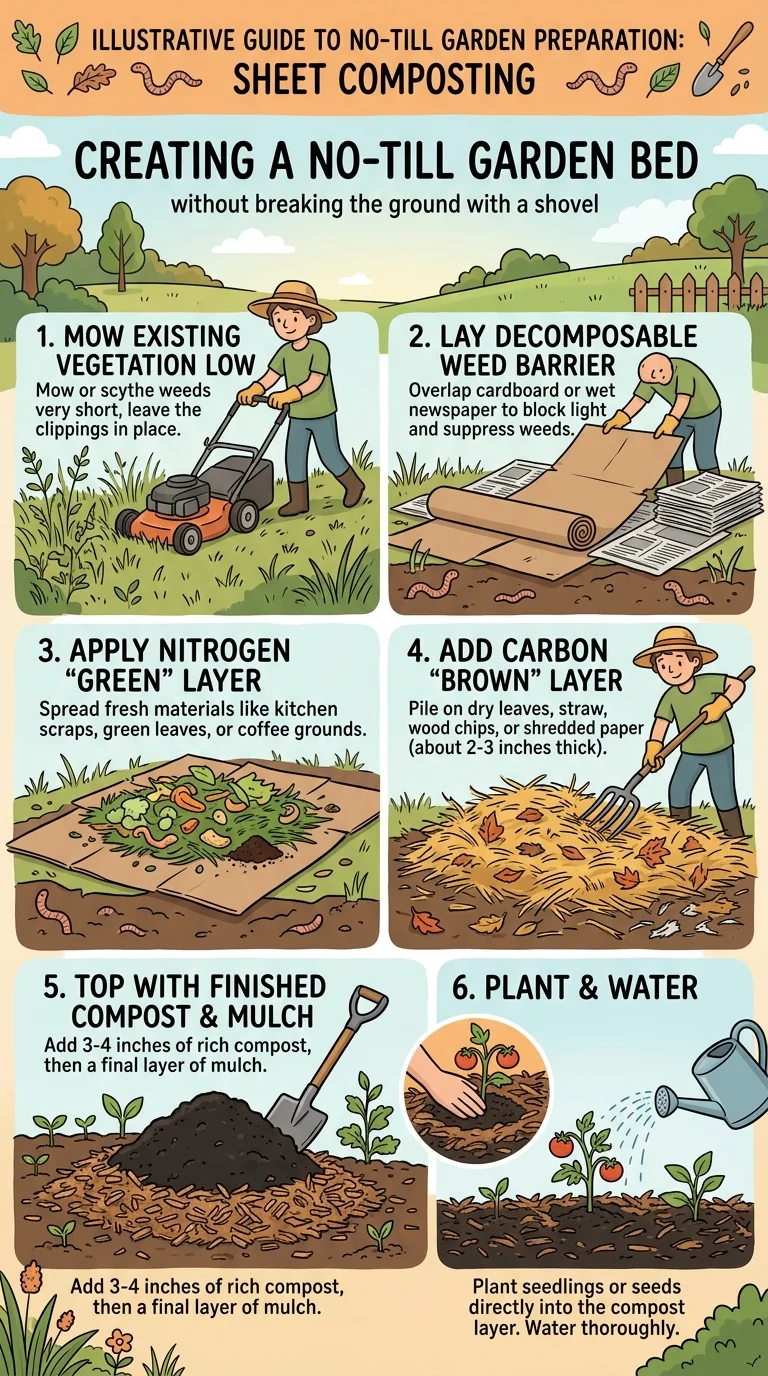
One classic way to prepare a garden bed is by smothering the grass. This is a very easy and gentle method. You do not have to dig up the sod at all. Instead, you use everyday items like cardboard and newspaper.
To start, mow the grass as short as you can in the area you want to plant. Next, gather large cardboard boxes. Make sure to pull off any plastic tape or shipping labels first. You do not want plastic trash in your soil.
Lay the cardboard directly over the mown grass. Make sure the edges overlap by at least six inches. If you leave any gaps, sneaky weeds will find their way through. If you do not have cardboard, you can use thick layers of newspaper instead. Use about ten sheets of newspaper for a good barrier.
Once your cardboard or paper is down, wet it thoroughly with your garden hose. Wetting it helps it stay in place and start breaking down. It also attracts friendly earthworms to your new garden spot. Earthworms love cardboard and will do the digging work for you.
Next, cover the wet cardboard with a thick layer of compost or rich topsoil. This layer should be about three to four inches deep. On top of that, add a nice layer of mulch to keep moisture in. Over the next few months, the grass underneath will die and rot. This process feeds the soil and makes it super soft for planting.
Another great way to prep your bed is called solarization. This method uses the heat of the sun to clean your soil. It is perfect if you have a patch of ground filled with tough weeds or pests.
To solarize your soil, you start by clearing the area of large rocks and weeds. Wet the ground thoroughly with your hose. Next, lay a sheet of clear plastic over the wet soil. Pin the edges down tightly with heavy stones or metal staples.
The sun will shine through the clear plastic and trap heat underneath. This creates a mini greenhouse effect. The soil temperature will rise very high over a few weeks. This high heat kills weed seeds, bad fungi, and pests in the top few inches of soil.
Many gardeners find that leaving the plastic on for six to eight weeks in the summer works best. When you pull the plastic off, you will have a clean slate. The soil will be ready for you to add compost and start planting.
Simple Steps to Make a Garden Bed
Now that you know how to get the ground ready, let us talk about how to make a garden bed. There are many fun ways to shape your growing space. The right choice for you depends on your physical strength, your budget, and your yard.
Let us start with the traditional digging method. Some gardeners love the feeling of turning the soil by hand. If you have strong arms and a sturdy shovel, you can try double-digging. This is an old-school method made famous by expert gardeners.
To double-dig, you work in rows across your new bed. You dig a trench that is one spade-blade deep and set that soil aside. Then, you use a garden fork to loosen the hard soil at the bottom of the trench. You move to the next row, dig up the topsoil, and slide it into the first trench.
You repeat this pattern all the way down the bed. It takes a lot of hard work, but it loosens the soil very deeply. This is wonderful for deep-root vegetables like carrots and parsnips. However, you must be careful not to mix the poor subsoil with your rich topsoil.
If you have a lot of rocks and tree roots, digging can be very frustrating. In that case, you might want to build a raised bed. Raised beds are wooden, metal, or stone frames filled with soil. They sit right on top of the ground.
Raised beds are wonderful for many reasons. First, you do not have to bend down as far to tend your plants. This is very kind to your back and knees. Second, you have total control over the soil inside the bed. You do not have to worry about the poor clay or rocks in your yard.
To make a raised bed, you can buy a kit or build one yourself out of untreated wood. Cedar and redwood are great choices because they do not rot quickly. Make your bed about three to four feet wide. This allows you to reach the middle easily from either side without stepping on the soil. Stepping on soil packs it down, which makes it hard for roots to grow.
Once your frame is built, lay cardboard at the bottom to kill any grass. Then, fill the bed with a mix of topsoil, compost, and peat moss or coconut coir. This creates a fluffy, rich soil that drains beautifully.
If you have a lot of fallen branches and logs in your yard, you can try a method called hugelkultur. This is a German word that means “hill culture.” It is a way to make raised beds using old wood.
To build a hugelkultur bed, you start by piling up logs and thick branches in a long mound. You can dig a shallow trench to start the pile, or just build it right on the grass. Next, fill the spaces between the logs with smaller branches, leaves, and grass clippings.
After that, cover the whole wood pile with a thick layer of topsoil and compost. The mound will look like a long garden hill. You can plant your vegetables right into the sides and top of the hill.
As the wood buried inside the mound slowly rots, it acts like a giant sponge. It holds onto rainwater and releases it slowly to your plants. This means you will not have to water your garden nearly as often. The rotting wood also warms up the soil and feeds your plants for many years.
No matter which way you choose to make your bed, you should always think about drainage. Plant roots need a balance of water and air. If water sits in your bed like a puddle, your plants can drown. You can test your drainage by digging a hole about one foot deep and filling it with water.
If the water drains away in a few hours, your drainage is good. If the water stays in the hole for a whole day, you have poor drainage. Adding organic matter like compost is the best way to fix drainage issues in any garden bed.
The Easy Way: No-Till Gardening
In recent years, many home gardeners have moved away from tilling. They are choosing a method called no-till gardening. This way of gardening is also called “no-dig” gardening. It is a wonderful, low-work way to grow amazing vegetables.
To understand why this works, we have to look at what lives inside the soil. Healthy soil is not just dead dirt. It is actually a busy underground city. It is filled with earthworms, helpful bacteria, and tiny fungi.
These tiny soil creatures work hard for you. They dig tiny tunnels that let air and water move through the ground. They also break down old leaves and bugs into food that your plants can eat.
When you use a heavy rototiller, you chop up this beautiful underground city. You destroy the tunnels and harm the earthworms. Tilling also brings buried weed seeds up to the warm surface where they can sprout. That is why tilled gardens often have so many weeds.
In no-till gardening, you leave the soil structure alone. Instead of digging compost into the ground, you simply lay it on top. This is exactly how Mother Nature feeds the forest floor. Leaves fall, rot on top of the soil, and feed the trees from above.
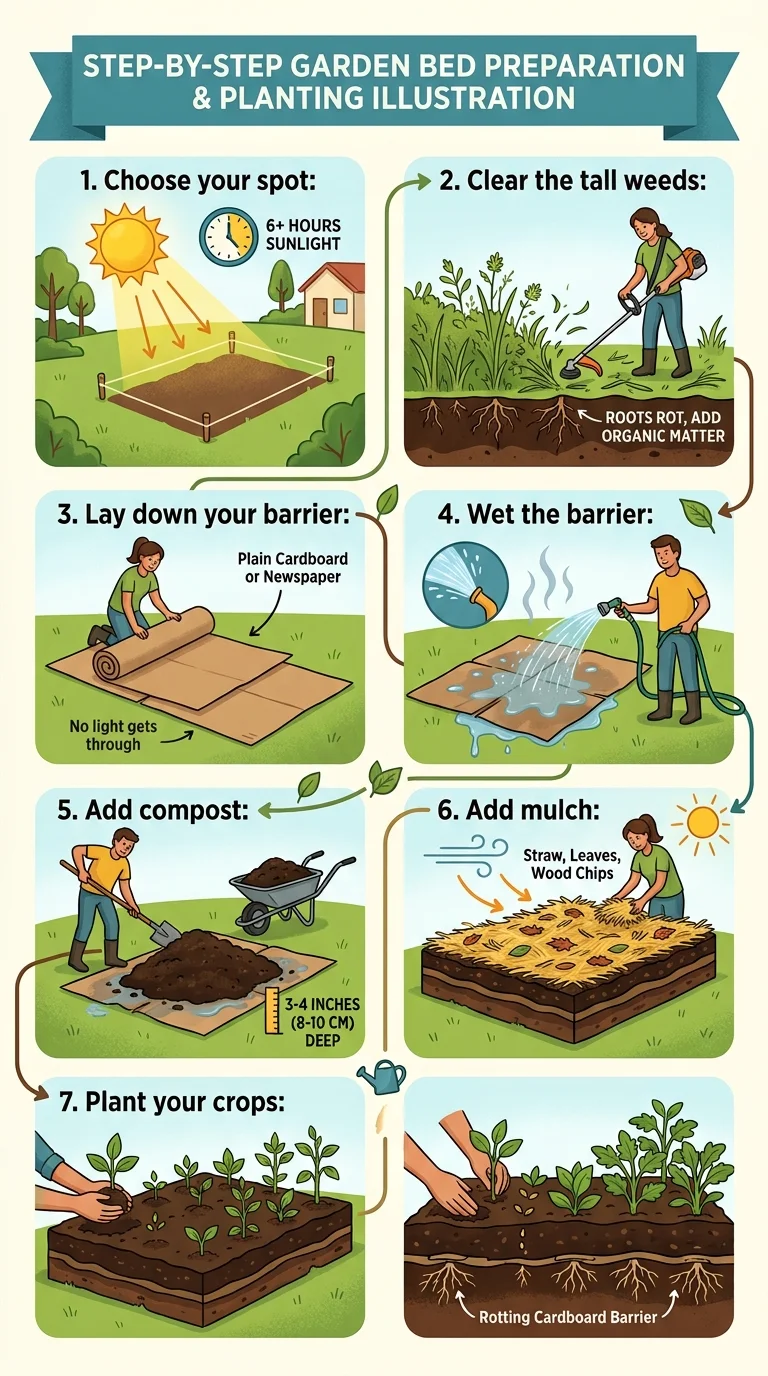
Here is a step-by-step guide to starting your own no-till garden bed:
- Choose your spot: Find a sunny area in your yard that gets at least six hours of sunlight each day.
- Clear the tall weeds: Cut down any tall weeds or grass in the area. You can leave the roots in the ground to rot and add organic matter.
- Lay down your barrier: Cover the entire area with thick, plain cardboard or newspaper. Overlap the edges so no light can get through.
- Wet the barrier: Spray the cardboard with water until it is completely soaked.
- Add compost: Spread a thick layer of high-quality compost over the cardboard. This layer should be about three to four inches deep.
- Add mulch: Cover the compost with a thin layer of straw, shredded leaves, or wood chips to protect it from the wind and sun.
- Plant your crops: You can plant seeds or starter plants directly into the compost layer. Their roots will easily grow down through the rotting cardboard into the soil below.
Once your no-till bed is set up, maintaining it is very simple. Every autumn or spring, you just add another inch of fresh compost to the top of the bed. You do not dig it in. You just let the rain and the earthworms carry the nutrients down for you.
This method saves you hours of hard labor. You will not have to spend your weekends pulling weeds or pushing a heavy machine. It also helps your soil hold onto water. The thick layer of organic matter on top acts like a blanket, keeping the soil cool and moist.
Many gardeners find that their plants are healthier in a no-till system. Because the soil food web is kept safe, your plants can easily get the nutrients they need to fight off diseases. It is a win-win for both you and your garden.
Growing Anywhere with a Moveable Garden
What if you do not have a big yard? Or what if your soil is full of heavy clay, rocks, or tree roots that you cannot dig up? You do not have to give up on your gardening dreams. You can easily set up a moveable garden.
A portable garden is perfect for renters, people with small patios, or anyone with limited space. It allows you to chase the sun around your yard. If a spot gets too shady in the summer, you can simply pick up your plants and move them to a sunnier place.
One of the most fun ways to make a portable garden is by using straw bales. This is a very cheap and easy method. You do not need any soil at all to get started.
To start a straw bale garden, you need to buy tight, wire-bound straw bales. Make sure you buy straw, not hay. Hay is full of weed seeds that will sprout into a grassy mess. Straw is just the dry leftover stems of grain crops.
Place your straw bales where they will get plenty of sun. You should put them on top of weed barrier fabric or cardboard to keep weeds from growing up through the bottom. Now, you must “condition” the bales. This means you get them to start rotting on the inside so they can feed your plants.
To condition a straw bale, you water it thoroughly every day for about two weeks. On every other day, you sprinkle a high-nitrogen organic fertilizer on top of the bale and water it in. This starts a natural composting process inside the straw.
The bale will actually get very hot to the touch. This is a sign that the friendly bacteria are busy working. After about ten to twelve days, the bale will cool down to warm room temperature. Now it is ready for planting.
To plant, you push the straw aside to make a small pocket. Fill the pocket with a handful of good potting soil. Put your plant starter right into the soil pocket and tuck the straw back around it. You can grow tomatoes, peppers, cucumbers, and herbs right out of the top of the bale.
Another wonderful option for a moveable garden is fabric grow bags. These are lightweight bags made of breathable fabric. They come in many sizes, from small pots for herbs to large bags that can hold a whole tomato plant.
Fabric bags are much better for plants than plastic pots. In a plastic pot, plant roots will grow until they hit the plastic wall. Then they will start spinning around the pot in a tight circle. This is called being “root-bound,” and it makes the plant weak.
In a fabric bag, when the roots reach the edge, they sense the dry air outside. The root tips naturally stop growing. This is called “air pruning.” It encourages the plant to grow lots of healthy, branching roots inside the bag.
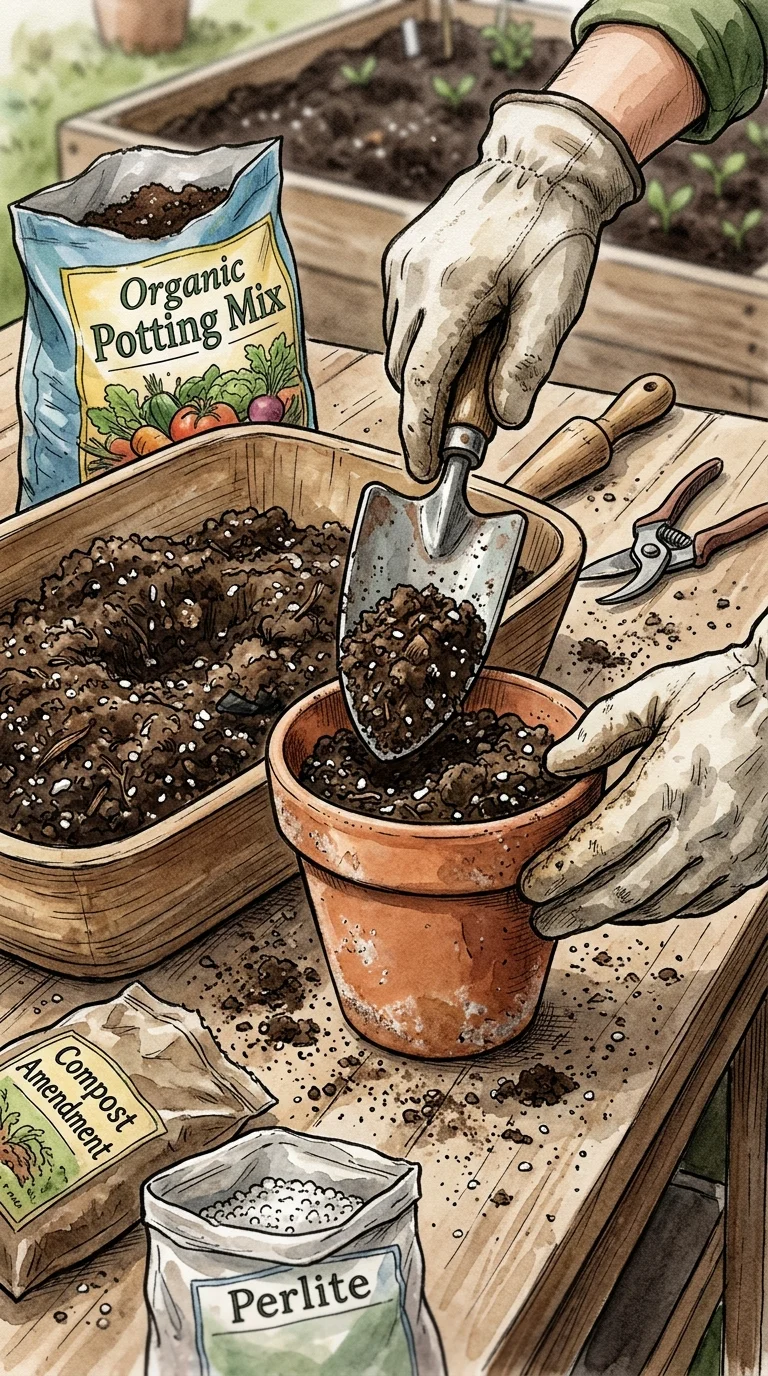
To fill your grow bags, you should use a high-quality potting mix. Do not use regular garden soil from your yard. Yard soil is too heavy and will pack down tight inside a container. This stops water from draining and can rot your plant roots.
A great potting mix recipe is equal parts compost, peat moss, and perlite. Perlite is those little white volcanic rocks you see in potting soil. It helps keep the soil fluffy and full of air. This mix is light, holds moisture well, and lets extra water drain out easily.
If you have trouble with pests like voles or gophers, fabric bags are a lifesaver. Voles love to tunnel under the ground and chew on the roots of your favorite plants. They cannot easily get through the tough fabric of a grow bag sitting on the ground.
You can set your grow bags on a sunny driveway, a deck, or even on a gravel path. If you need to move them, simply grab the sturdy handles and carry them to a new spot. It is a wonderful way to garden on your own terms.
Frequently Asked Questions
Q: How deep should I prepare my soil before planting vegetables?
A: Generally, most vegetables do best when the top 8 to 12 inches of soil are loose and rich. This gives their roots plenty of room to grow deep for water and food. If you are growing root crops like carrots, you may want to loosen the soil even deeper to prevent crooked veggies.
Q: Can I use fresh manure to prepare my garden soil?
A: It is usually best to avoid using fresh manure right before you plant. Fresh manure is very “hot” because it contains a lot of nitrogen, which can burn your tender plant roots. It can also carry bad bacteria. Many gardeners find it is safer to use well-rotted composted manure instead.
Q: How do I know if my soil is acidic or alkaline?
A: You can easily test your soil with a cheap test kit from your local garden center. Some gardeners also use a simple home test with vinegar and baking soda. If your soil bubbles when you add vinegar, it is alkaline. If it bubbles when you add baking soda and water, it is acidic.
Q: What is the best time of year to prepare my soil?
A: In most cases, autumn is a wonderful time to start preparing your beds for the next spring. This gives any added compost and cardboard plenty of time to break down over the winter. However, you can also prepare your soil in the early spring as soon as the ground is dry enough to work.
Q: How can I fix hard clay soil without a machine?
A: You can easily soften hard clay soil over time by adding lots of organic matter like compost, leaf mold, or aged wood chips to the surface. Avoid digging or tilling clay when it is very wet, as this can make it dry out even harder. No-till sheet mulching is often the easiest way to improve clay soil.
Q: Do I need to buy fertilizer if I use a lot of compost?
A: In many cases, high-quality compost provides all the nutrients your plants need to grow happy and healthy. Compost is like a slow-release multivitamin for your soil. If your plants look like they need an extra boost during the summer, you can use a gentle organic liquid fertilizer like fish emulsion.